How to get your solar connected
 Navigating the process with your installer and your utility to connect your solar system to the grid can be challenging. It is the final, and sometimes longest and most confusing step before you can start saving money with solar energy.
Broadly, there are three rounds of approval that you will need before your system can get up and running. Before your system is installed, your installer will submit an application to put a solar system on your home. The installer will then install your system once the utility gives its initial approval. Even though your system has been installed, it is not yet on.
Your county will then inspect the system for safety. Once the county approves the system, your installer will then ask your utility to approve connection to the electric grid.
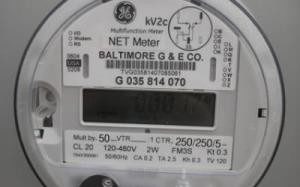
Your utility will come to your home to either provide you with a new electric meter that tracks when your system is sending electricity to the grid, or re-program the meter you have to do so. Once this process has been completed, the utility will send you the final interconnection approval. Then you may then flip on the switch and begin powering your home with solar!
Please check out our recommendations page if you find your utility is not providing a timely response. A detailed breakdown of this process is below.
Interconnection timeline:
- Your installer submits an interconnection application to the utility.
- Your utility accepts the application and approves work to begin.
- Your system gets installed and then inspected by the local jurisdiction.
- TIP: Get copy of inspection card/form from installer for your records.
- Your installer submits a request for interconnection authorization with the inspection information.
- TIP: Contact your installer to verify that Part 2 of the interconnection application has been submitted and ask for a copy of the submission; Your email and your installer’s email addresses should both be included on the application form.
- TIP: If utility does not email acknowledgement of your application promptly, contact their interconnection team to inquire about the status of the approval.
- Your utility visits your property and either replaces or re-programs your meter as a net meter.
- NOTE: At this point your utility should be able to tell you the date your net meter will be installed. It should also give you guidance on when you will have “final approval” to operate your system.
- Your utility authorizes the installation and provides “permission to operate”.
- TIP: The utility should email the final approval notice to you and your installer. Be sure to get a copy of the completed interconnection paperwork provided by the utility. You will need this to complete your registration for SRECs.
- Once you have your “permission to operate”, you are allowed to turn on your system to generate money-saving clean energy and get credit for it on your bill.
NOTE: PEPCO’s description of the process; BGE’s description of the process;